Achieving a brighter, whiter smile has become increasingly accessible thanks to advancements in at-home teeth whitening. Among the leading solutions, the Philips Zoom Teeth Whitening Home Kit stands out for its effectiveness and convenience. This comprehensive guide will walk you through everything you need to know about the Philips Zoom Home Kit, from understanding its components and the step-by-step whitening process to tips for maximizing your results and comparing it with other options. Get ready to unlock the secrets to a dazzling smile!
What is Philips Zoom Teeth Whitening Home Kit
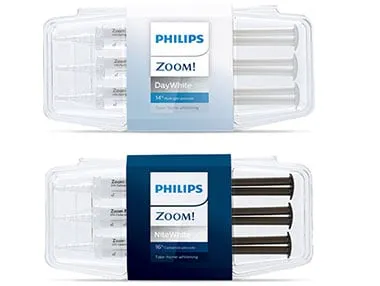
The Philips Zoom Teeth Whitening Home Kit is a professional-grade teeth whitening system designed for use in the comfort of your own home. It is a popular choice due to its ability to deliver significant whitening results in a relatively short period. The kit typically combines custom-fit whitening trays, a whitening gel with a specific percentage of hydrogen peroxide or carbamide peroxide, and detailed instructions to guide you through the process. Philips Zoom aims to offer a convenient and effective solution for those seeking to brighten their smiles and boost their confidence.
Components of the Philips Zoom Home Kit
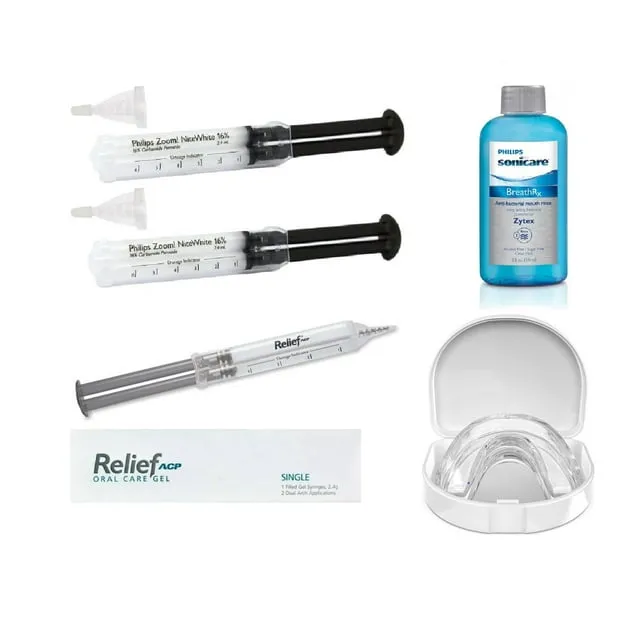
Understanding the components of your Philips Zoom kit is crucial for a successful whitening experience. The essential components include custom-fitted trays, whitening gel, and detailed instructions. The custom trays are created specifically for your mouth, ensuring the gel is applied evenly and effectively to your teeth. The whitening gel is the active agent, containing either hydrogen peroxide or carbamide peroxide, which penetrates the enamel to break down stains. The instructions provide clear guidance on application, treatment duration, and post-whitening care. Additional components might include a shade guide to track your progress and desensitizing gel to minimize sensitivity.
The Philips Zoom Whitening Process Step by Step

Following the steps outlined in the Philips Zoom kit is essential to achieve optimal results. The process is designed to be straightforward, but careful attention to detail is key. Here’s a detailed breakdown of the process.
Step 1 Preparing Your Teeth
Before applying the whitening gel, ensure your teeth are clean and dry. Brush and floss your teeth thoroughly to remove any food particles or debris that could interfere with the whitening process. Rinse your mouth with water to further clean your teeth. Avoid using toothpaste with abrasive ingredients immediately before whitening, as this can cause sensitivity. Preparing your teeth properly sets the stage for the whitening gel to work effectively, allowing for better penetration and more even results. This initial preparation is vital for maximizing the whitening impact and minimizing potential side effects such as sensitivity.
Step 2 Applying the Whitening Gel
Carefully apply a small amount of whitening gel into the custom trays. It’s essential not to overfill the trays, as excess gel can leak out and irritate your gums. Typically, a small bead of gel along the front surface of each tooth in the tray is sufficient. Follow the manufacturer’s instructions regarding the precise amount to use. Once the gel is applied, insert the trays into your mouth, ensuring they fit snugly over your teeth. Make sure the gel is evenly distributed for consistent whitening across all teeth. Any excess gel should be wiped away with a clean tissue to prevent gum irritation. This step sets the foundation for the whitening process.
Step 3 Using the Custom Trays
After applying the whitening gel, insert the custom trays into your mouth. The trays should fit comfortably and securely over your teeth. Press gently to ensure the trays are properly seated, allowing the gel to come into contact with the tooth surfaces. Follow the instructions for how long to wear the trays, typically ranging from 30 minutes to several hours, depending on the kit and the desired outcome. Avoid eating or drinking anything except water during the treatment period. Once the designated time is up, remove the trays and rinse your mouth thoroughly with water. Use a soft-bristled toothbrush to gently brush away any remaining gel. Make sure to clean the trays thoroughly after each use to prevent bacterial buildup and ensure their longevity.
Step 4 Treatment Duration and Frequency
The duration and frequency of the treatment vary based on the specific Philips Zoom kit you’re using and your dentist’s recommendations. Generally, home whitening treatments are conducted daily for a period of one to two weeks, or as directed by your dentist. Follow the instructions provided with your kit to avoid over-whitening your teeth, which can cause increased sensitivity. Keep track of your progress and adjust the treatment duration as needed. If you experience any discomfort or sensitivity, it is recommended to reduce the treatment time or consult with your dentist. Consistent use within the recommended guidelines ensures the best possible whitening results. Be patient and consistent for optimal outcomes.
Step 5 Post-Whitening Care
After completing each whitening session, it’s important to practice proper post-whitening care. Rinse your mouth thoroughly with water to remove any remaining gel. Avoid consuming foods and drinks that can stain your teeth, such as coffee, tea, red wine, and dark-colored berries, for at least one hour after treatment. Brush your teeth gently with a soft-bristled toothbrush and a toothpaste designed for sensitive teeth. If you experience any sensitivity, use a desensitizing toothpaste or gel as recommended by your dentist. Avoid smoking, as it can reverse the whitening effects. This proactive approach helps maintain your newly whitened smile and minimizes any adverse effects from the whitening process. Regular follow-up appointments with your dentist will also ensure the long-term health and vibrancy of your smile.
Tips for Maximizing Whitening Results

To achieve the best possible results with your Philips Zoom Teeth Whitening Home Kit, there are several tips to keep in mind. Consistency is key; follow the treatment schedule precisely as directed. Avoid foods and drinks that stain your teeth, especially during the whitening period. Consider using a whitening toothpaste to maintain your results. Ensure you are using the correct amount of gel in the trays to prevent any gum irritation. Consult your dentist if you have any questions or concerns about your whitening process. By incorporating these tips, you can maximize your chances of achieving a brighter, more confident smile.
Avoiding Common Whitening Mistakes
Several common mistakes can hinder your whitening results. One of the most frequent errors is using too much whitening gel, which can lead to gum irritation and sensitivity. Over-whitening your teeth by exceeding the recommended treatment duration is another mistake that should be avoided. Failing to maintain a consistent treatment schedule or neglecting to avoid staining foods and drinks can also diminish the effectiveness of the kit. Not following instructions and improper tray fit can also lead to undesirable results. Lastly, ignoring dental health issues, such as cavities or gum disease, prior to whitening can be problematic. Addressing these mistakes ensures the successful and safe whitening of your teeth.
Maintaining Your White Smile
Once you have achieved your desired level of whiteness, maintaining your results is crucial. Regular dental checkups and cleanings are essential to keep your teeth healthy and bright. Avoid smoking and minimize your consumption of staining foods and drinks. Use a whitening toothpaste a few times a week to help remove surface stains and maintain your results. Consider occasional touch-up treatments with your Philips Zoom kit or other whitening products to keep your smile looking its best. Practicing good oral hygiene, including regular brushing and flossing, is key. By following these maintenance steps, you can enjoy a brighter, more confident smile for years to come.
Philips Zoom Teeth Whitening Kit Pros and Cons

Like all teeth whitening methods, the Philips Zoom Home Kit has its advantages and disadvantages. Understanding these pros and cons will help you determine if it is the right choice for you.
Pros of Using the Philips Zoom Home Kit
- Convenience: Whiten your teeth at home, on your schedule.
- Effectiveness: Produces noticeable results in a short time.
- Professional-grade quality: Utilizes professional-strength whitening gel.
- Custom trays: Ensures even application and better results.
- Cost-effective: Generally more affordable than in-office treatments.
Cons of Using the Philips Zoom Home Kit
- Sensitivity: Can cause temporary tooth sensitivity and gum irritation.
- Time commitment: Requires daily application over a period of time.
- Not for everyone: May not be suitable for those with certain dental conditions.
- Results vary: Whitening results can vary depending on the type of stains and individual tooth structure.
- Potential for misuse: Overuse can lead to complications.
Comparing Philips Zoom with Other Kits

When comparing the Philips Zoom Teeth Whitening Home Kit with other options, consider its key features. Compared to over-the-counter whitening strips or toothpastes, Philips Zoom often delivers faster and more dramatic results due to its higher concentration of whitening agents and custom-fitted trays. While in-office whitening treatments offer the fastest results, the Philips Zoom kit provides a more convenient and budget-friendly alternative. Compared to other home whitening kits, Philips Zoom stands out for its quality and effectiveness. Factors such as the concentration of the active ingredient, the design of the trays, and the inclusion of desensitizing agents set it apart. Always evaluate the features to find the best fit for your needs and expectations.
In conclusion, the Philips Zoom Teeth Whitening Home Kit offers a convenient and effective way to achieve a brighter, whiter smile. By following the step-by-step instructions, understanding the pros and cons, and practicing proper post-whitening care, you can maximize your results. Remember to consult with your dentist to ensure that teeth whitening is suitable for your specific dental health needs. With the right approach, you can confidently enjoy a dazzling, radiant smile. So go ahead and illuminate your smile with the Philips Zoom kit and embrace a brighter, more confident you!